Model Context Protocol: What It Is and How to Use It
MCP (Model Context Protocol) is an open standard based on JSON-RPC that defines how LLMs connect to tools, services, and data. With MCP, developers don't need to build custom integrations for every single tool.
The protocol supports two-way communication: AI agents can not only request and receive data, but also perform actions in external applications or even directly in the operating system. In short, MCP provides a universal interface that makes it easier for LLMs to work with external tools and resources.
For more details about the concept and usage, see the documentation from the creators of MCP — Anthropic. A curated list of MCP servers is available in the repository: https://github.com/modelcontextprotocol/servers.
Connecting MCP Server in Explyt
To connect MCP server in the Explyt Plugin, open the IntelliJ IDEA settings and go to Explyt -> MCP Servers.
![]() Depending on the type of server you're connecting, choose the protocol type: STDIO, SSE, or HTTP.
Depending on the type of server you're connecting, choose the protocol type: STDIO, SSE, or HTTP.
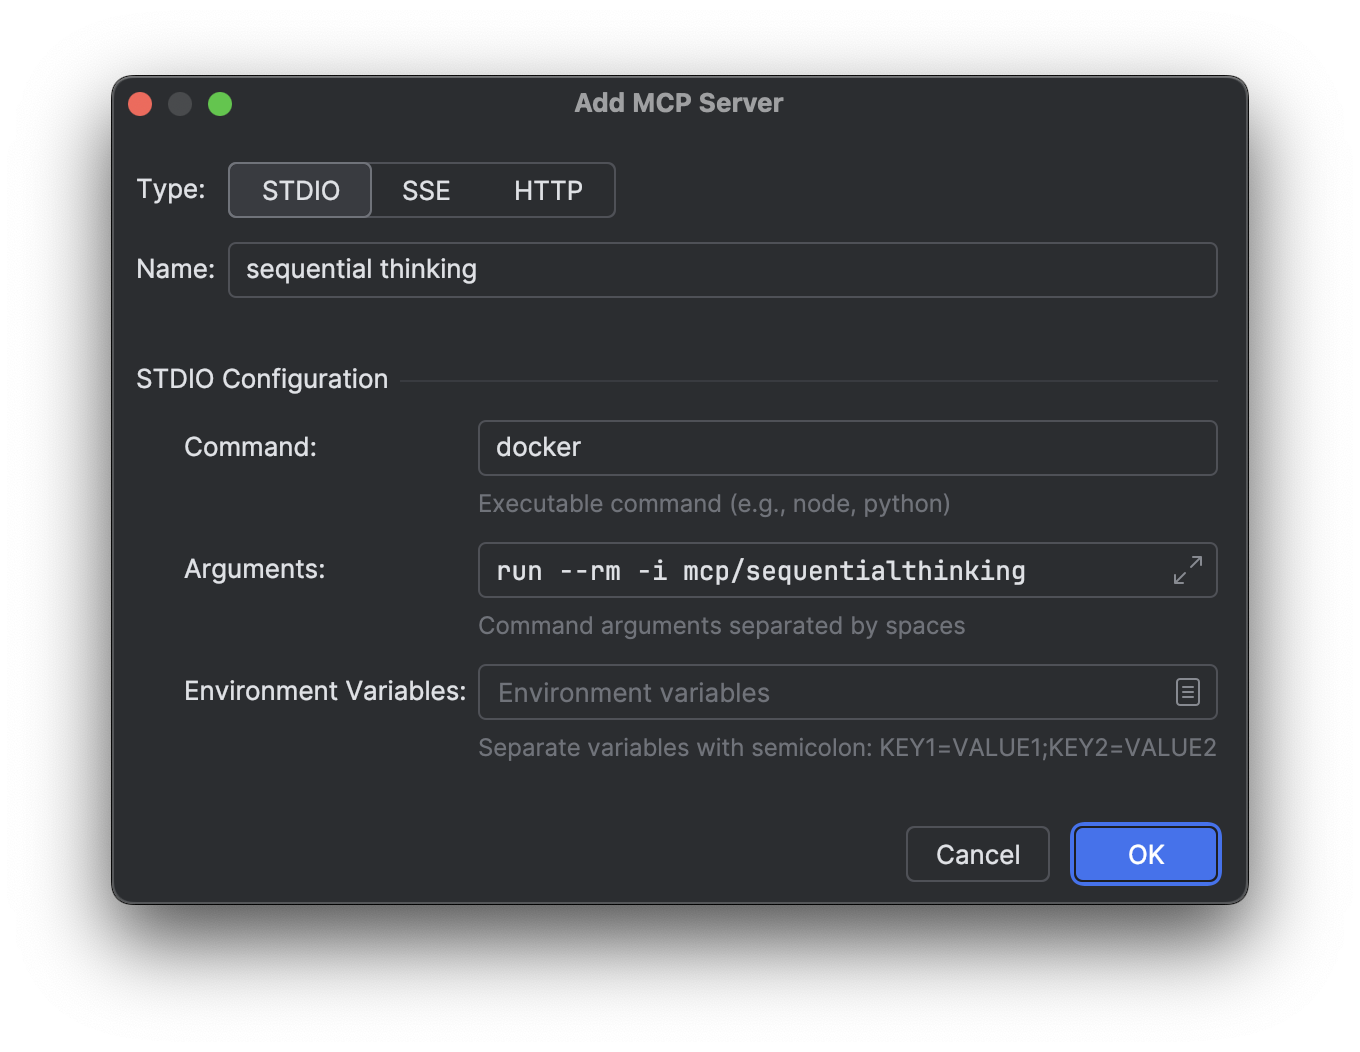
STDIO
STDIO (Standard Input/Output) is mainly used for MCP servers running locally. This command should start the MCP server on your machine. Before connecting, make sure the startup command runs successfully (for example, that the Docker image is downloaded and starts correctly with the required arguments).
To connect, click the ![]() (Add Server) button and enter the executable command and its arguments:
(Add Server) button and enter the executable command and its arguments:
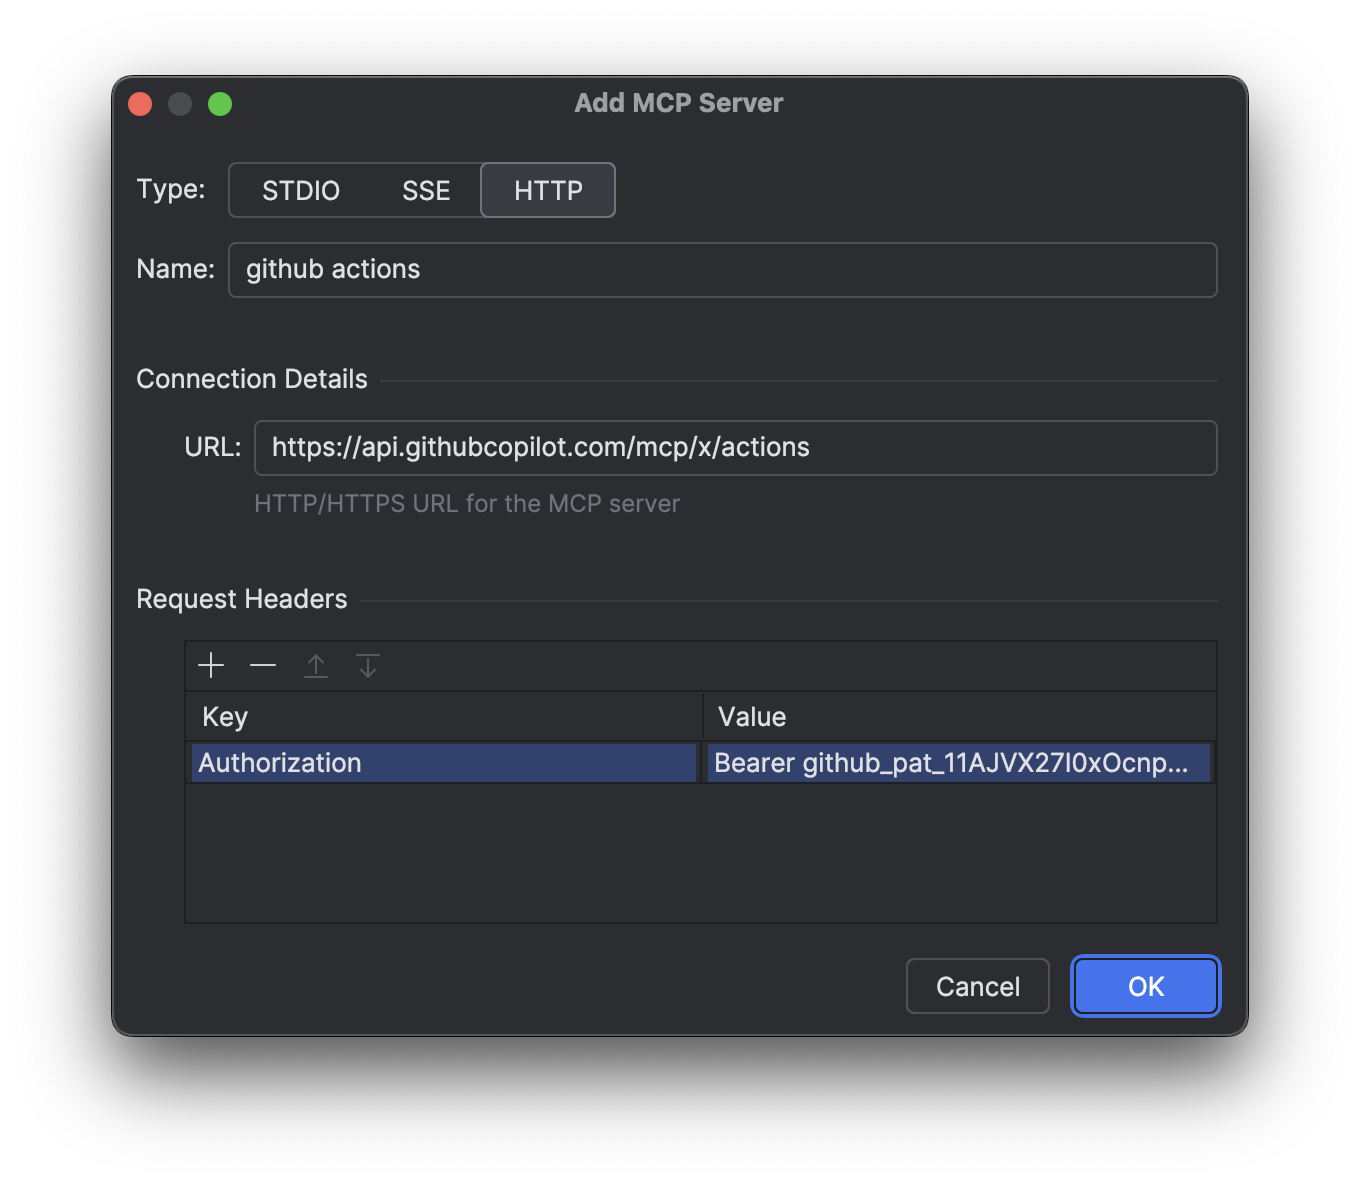
SSE/HTTP
For network connections, enter the URL of the desired MCP server in the corresponding field. Some servers require authentication via Bearer or other methods. To connect, obtain the necessary key and specify it in the "Request Headers" section:
Connecting and Using
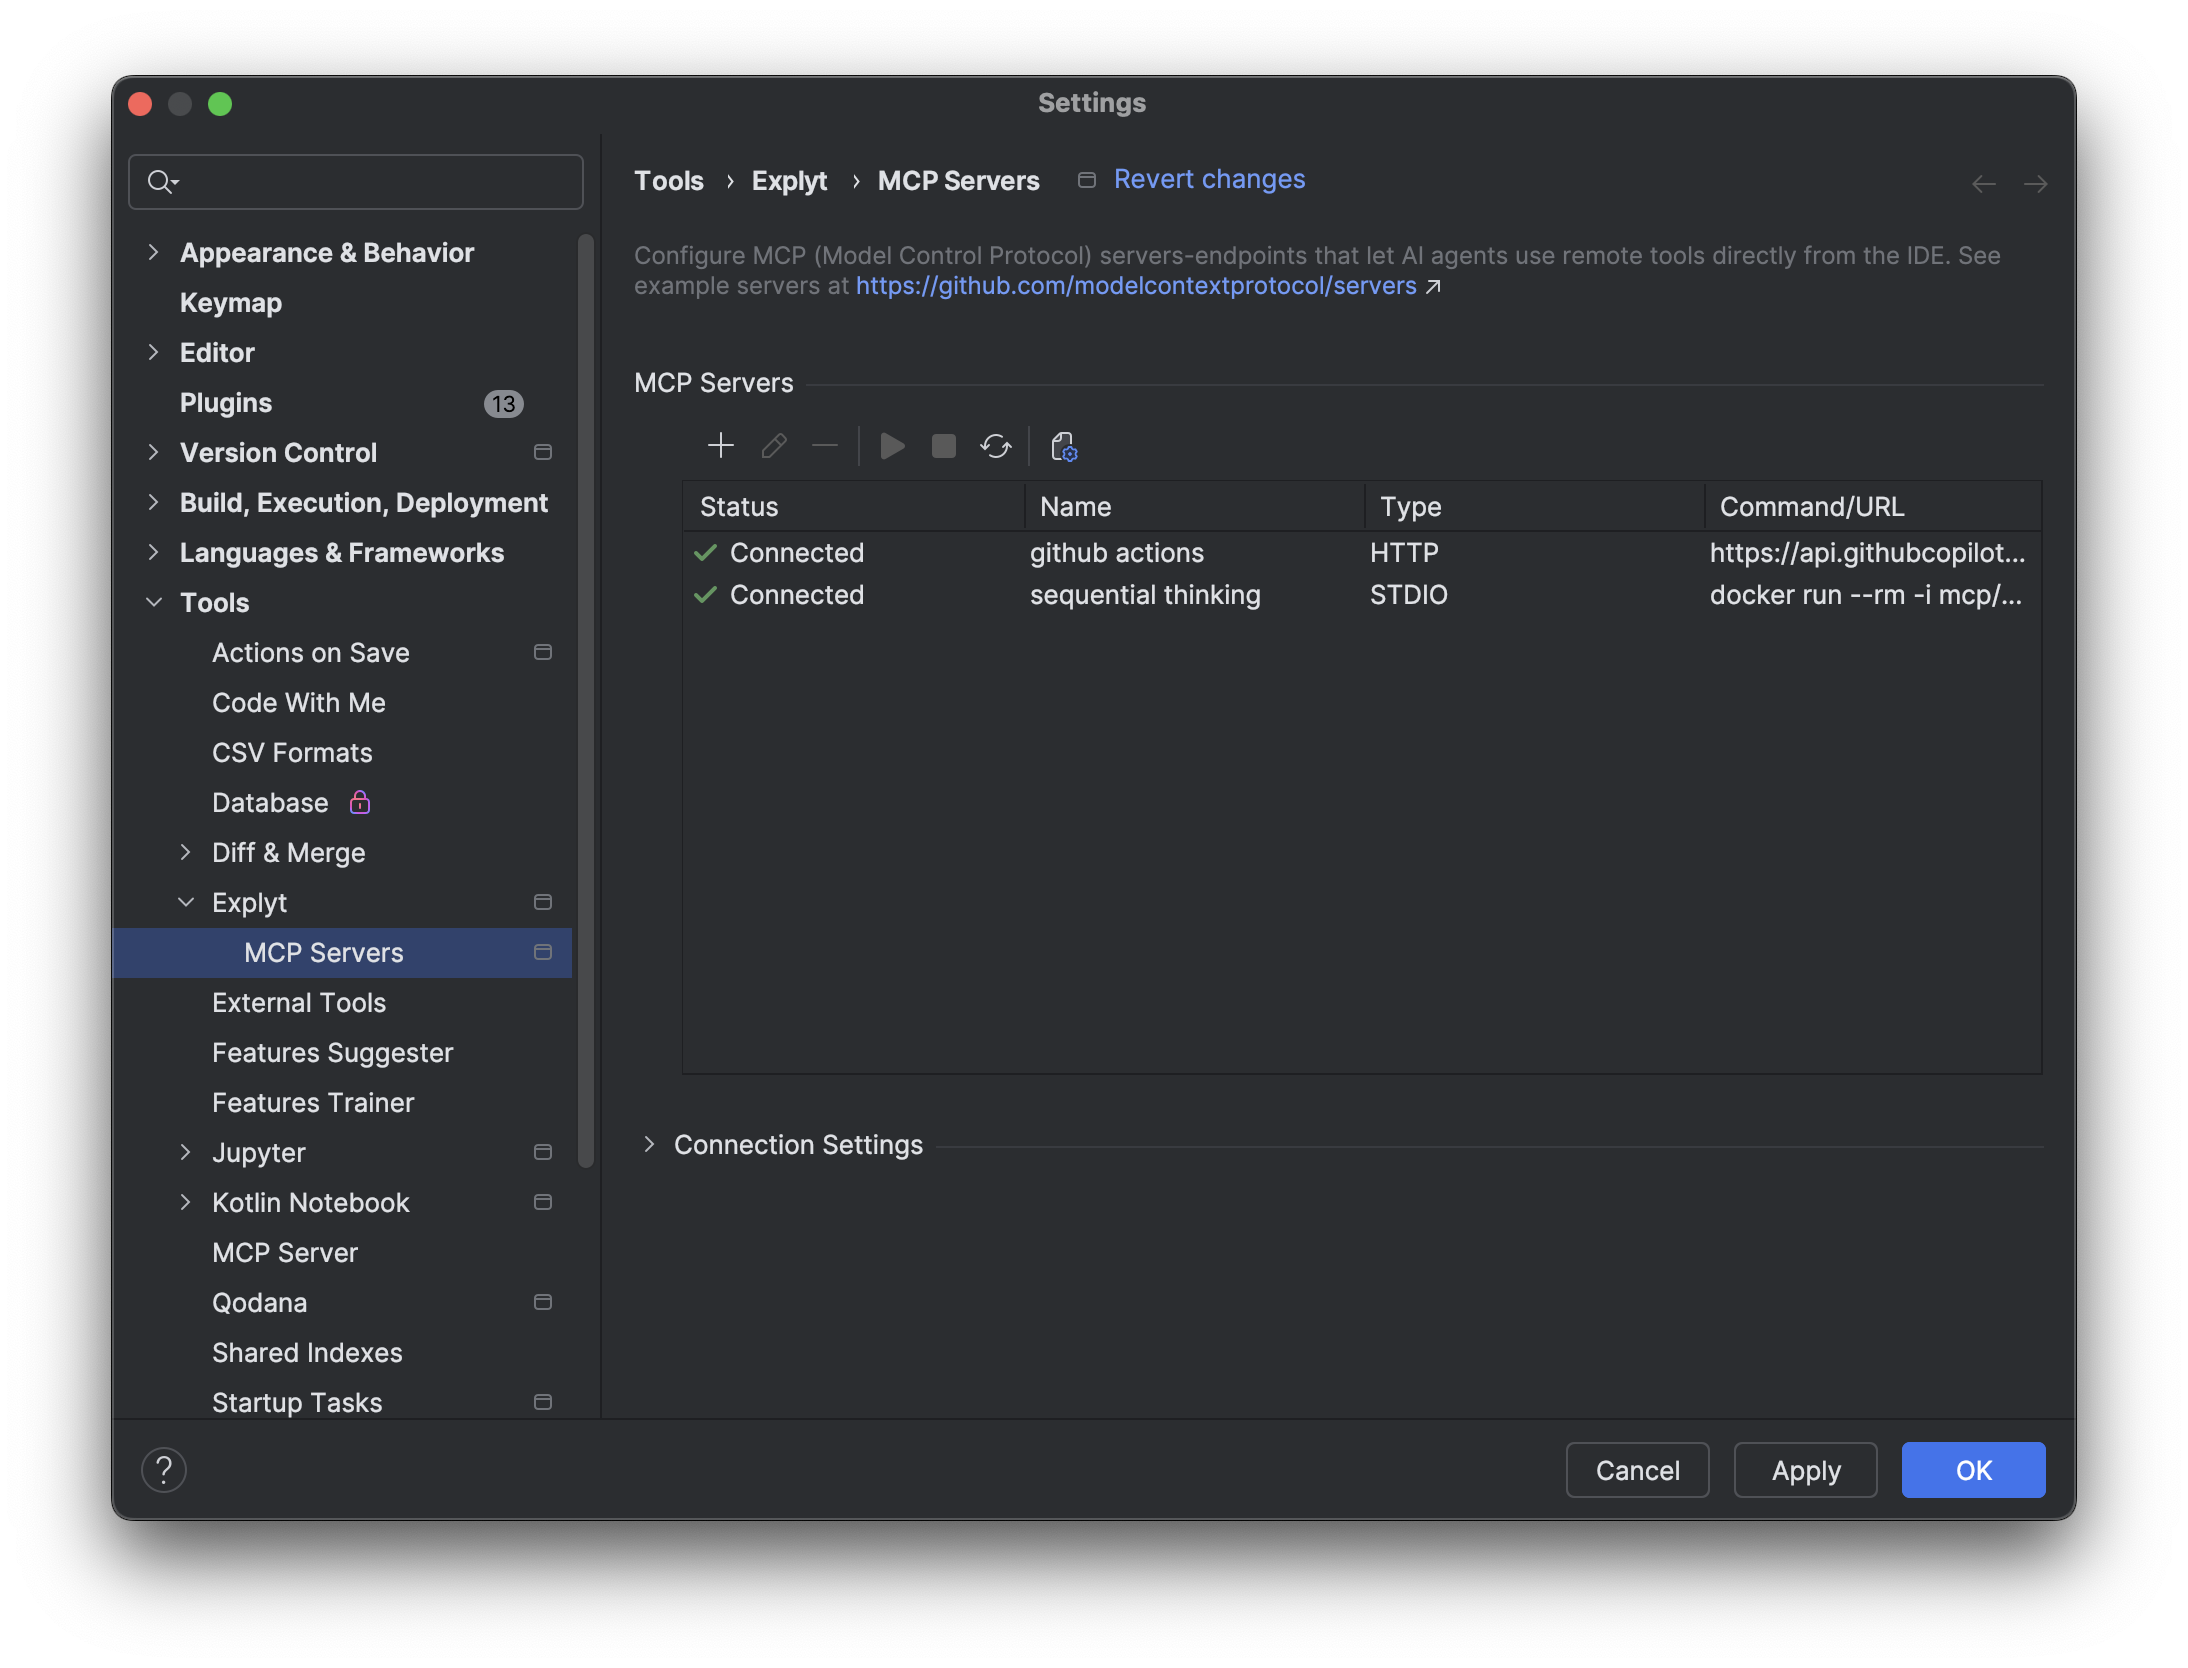
To establish a connection, select the configuration you added and click the ![]() (Connect) button. After a successful connection, the server status will change to "Connected", and its tools will be available in the
(Connect) button. After a successful connection, the server status will change to "Connected", and its tools will be available in the ![]() (Tools) section of the Explyt Agent chat header
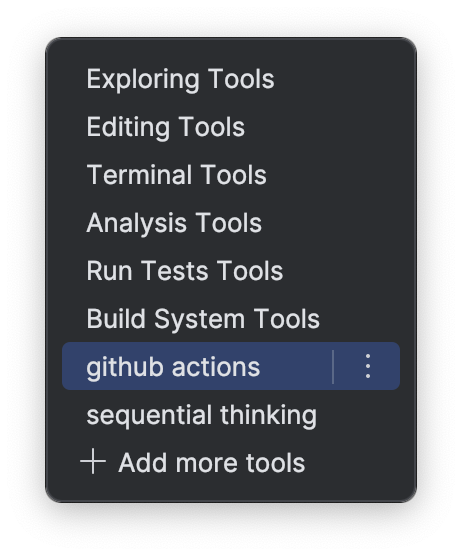
(Tools) section of the Explyt Agent chat header ![]() . To see the list of tools, open the dropdown menu with the connected server's name.
. To see the list of tools, open the dropdown menu with the connected server's name.
Built-in JetBrains MCP server

If the built-in JetBrains MCP server is enabled in the IDE, Explyt connects to it automatically. You do not need to copy the server address or add it to the MCP server list by hand.
After connection, JetBrains MCP tools are available to the agent together with your other MCP tools.
How the agent calls MCP servers
Previously, the chat tool limit was 128. Large MCP servers provide dozens of tools: for example, GitHub has about 70 (read an issue, read a PR, view notifications, star a repo, etc.). Connecting just 2–3 such servers was enough to exhaust the limit and break the agent.
Now, if the total number of tools exceeds 128, each MCP server is wrapped in a separate subagent. The main agent has access to only one tool for calling the server, while the full command set stays inside the subagent. If a server is small (for example, DuckDuckGo with 2 tools) and the overall limit is not exceeded, it works as before, without launching a subagent.
No configuration needed. The plugin automatically determines when to use subagents and when to work directly. Where things worked before, they continue working as before. Where the plugin previously failed due to the limit being exceeded, it will now work.
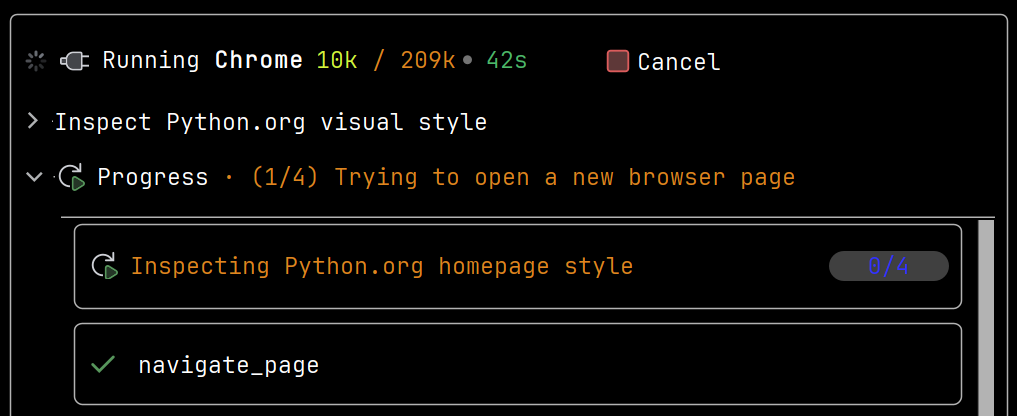
During a call, chat shows an expandable Running <mcp_server> panel. The Progress section shows which tools the subagent uses. When the call finishes, the result appears in Finished.
Binary data from MCP servers
MCP servers can return images, audio, and other non-text data alongside text. Explyt saves those responses as separate files and attaches them to the chat, instead of stuffing everything into one base64 block.
JSON Configuration
The configured servers live in mcp_servers.json. By default, it's in your home directory (~$USER/.explyt/mcp_servers.json on UNIX, $env:USERPROFILE\.explyt\mcp_servers.json on Windows). Open it by clicking the ![]() (Open Config File) button, edit, save, then click
(Open Config File) button, edit, save, then click ![]() (Refresh Servers) to reload.
(Refresh Servers) to reload.
MCP services can be project-specific: put mcp_servers.json in .explyt/ at the project root. It won't interfere with global settings. Useful when different projects need different MCP servers.
Environment variables in configuration
The JSON config supports ${env:VARIABLE_NAME} placeholders — they get replaced from environment variables. No need to hardcode tokens:
{
  "my-server": {
    "type": "http",
    "url": "https://api.example.com/mcp",
    "headers": {
      "Authorization": "Bearer ${env:MCP_TOKEN}"
    }
  }
}
Re-enable disconnected servers all at once
If several MCP servers disconnected (say, after an IDE restart), one button re-enables them all instead of starting each one by hand.
GitHub
- Insert the following lines into your JSON configuration file:
{
  "github": {
    "type": "http",
    "url": "https://api.githubcopilot.com/mcp",
    "headers": {
      "Authorization": "Bearer GITHUB_TOKEN"
    }
  }
} - Replace
GITHUB_TOKENwith your classic GitHub token. - You can create a new token by following this guide. The token must have at least
repopermissions. - In the IDE settings, go to Explyt, MCP Servers and click the "Update" button.