How to Install Spring Explyt Plugin
Compatible with IntelliJ IDEA Community Edition v.2024.1+
The plugin is published in the JetBrains Marketplace under the name "Spring Explyt" (plugin id: 28675). Below are several ways to install it.
Install from JetBrains Marketplace (recommended)
- Open IntelliJ IDEA and go to
Settings (Preferences)→Plugins. - Switch to the Marketplace tab and search for
Spring Explyt. - Click Install, then Restart IDE when prompted.
Alternative: open the plugin page in your browser (https://plugins.jetbrains.com/plugin/28675-spring-explyt) and click Install —
if IntelliJ IDEA is running, the IDE will open the plugin page and allow installation from the browser.
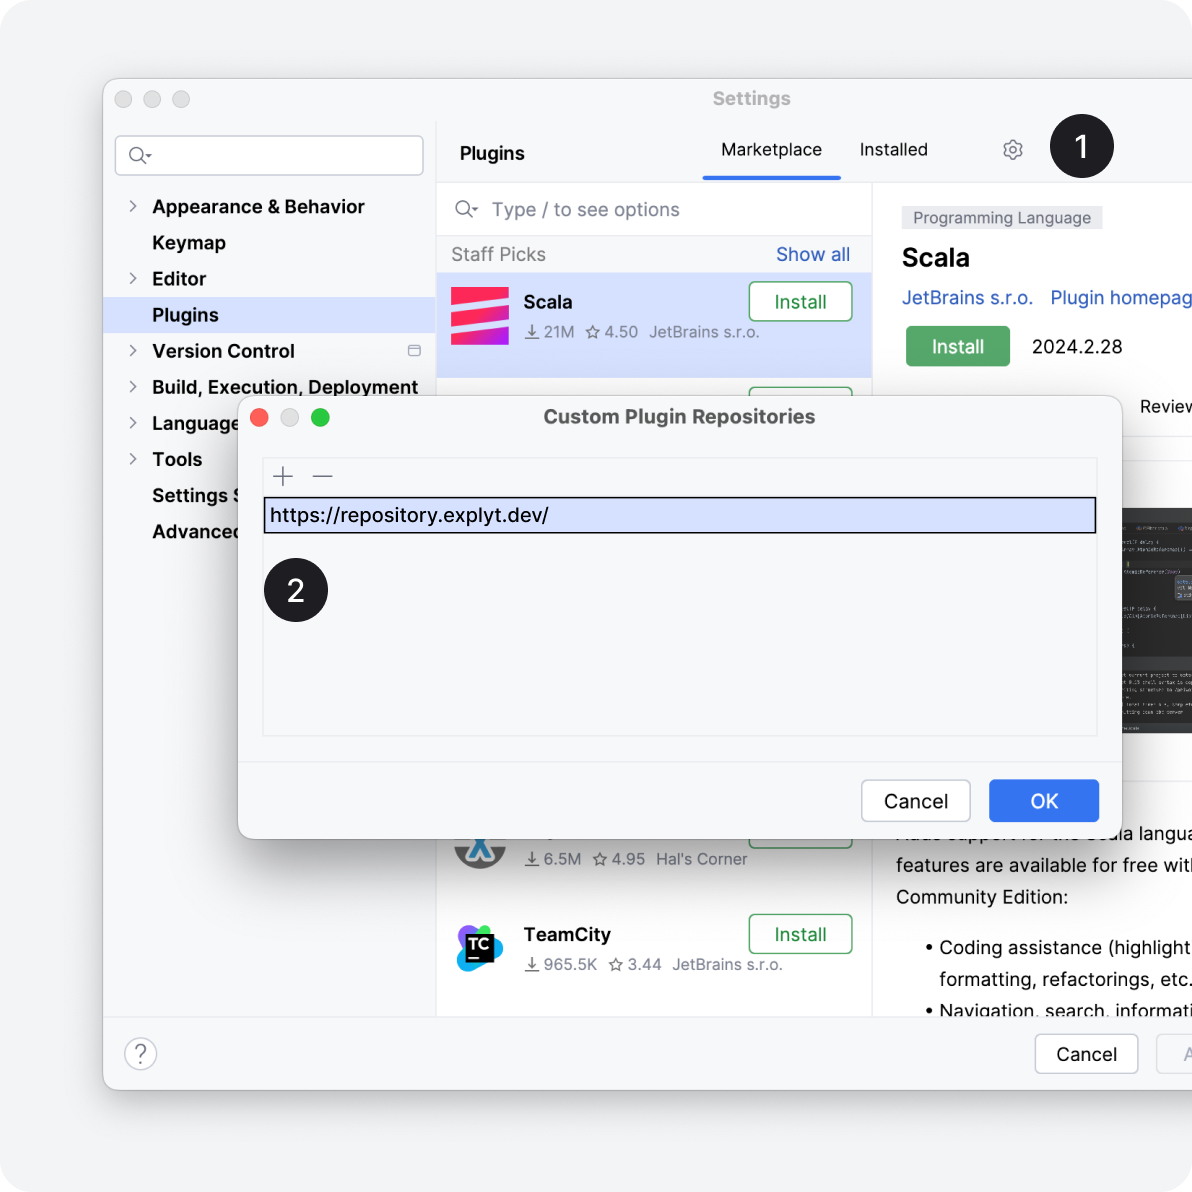
Add Explyt custom plugin repository (optional)
If you prefer or if you don't have direct access to the JetBrains Marketplace, you can still add our custom plugin repository:
- In
Settings (Preferences)→Pluginsclick the Settings icon. - Choose
Manage Plugin Repositories. - Click "+" and paste: https://repository.explyt.dev/
Manual installation from ZIP
You can also download plugin zip files from GitHub and install them manually (note: you won't receive automatic updates this way).
