Test Reproduction - Quick Start Guide
Before You Start
What is the Test Reproduction Feature?
The Test Reproducer introduces a new level of debugging and test generation.
Instead of manually reconstructing the scenario that led to a bug or unexpected behavior, you can now capture a concrete execution and instantly convert it into a standalone, executable unit test.
The generated test replicates the exact behavior, input data, and call structure — giving you a reliable way to debug issues, prevent regressions, and document complex flows with minimal effort.
Sounds Cool! But How Does It Work?
The Test Reproducer operates much like a debugger — it observes your program as it runs.
-
Execution Capture
You start your application, test, or method using a standard run configuration, or attach to a running process.
Under the hood, we connect to the JVM using the Java Debug Interface (JDI) and track method calls, arguments, return values, and exceptions. -
Trace Recording
While your code is running, we record the exact behavior of the method under test — including inputs, control flow, and internal state — with high fidelity.- First, we inspect the
thisobject (if applicable), capturing its class, fields, and construction context. - Next, we analyze all method arguments — primitive types, collections, and custom objects.
- Then, we observe the method’s execution: nested calls, exceptions, and returned results.
- First, we inspect the
-
Heuristic-Based Object Reconstruction
To make the generated test realistic and easy to understand, we apply heuristics similar to what a developer would use when writing a test by hand:- If an object is simple (like a POJO or Kotlin data class), we reconstruct it using constructors or builders.
- If it's complex or external (e.g., services, sockets, databases), we mock it using your selected mocking framework.
- If the object looks serializable, we try to serialize it to JSON and restore it from that — improving clarity and reproducibility.
-
Test Rendering
Once execution is complete, we use the collected data to generate a unit test that faithfully mirrors the original call.
The test includes setup, mocks, method invocations, and assertions. -
AI-Powered Refinement
The raw test code is then cleaned and refined using modern Large Language Models (LLMs).
This ensures your test is readable, idiomatic, and aligned with your project's style.
✔ The result is a ready-to-run unit test that captures a real execution — written just like a developer would do it by hand.
What Languages Are Supported?
The following languages are currently supported:
- Java
- Kotlin
Mixed-language projects are also supported, as long as both languages are traceable during execution.
1. How to Start?
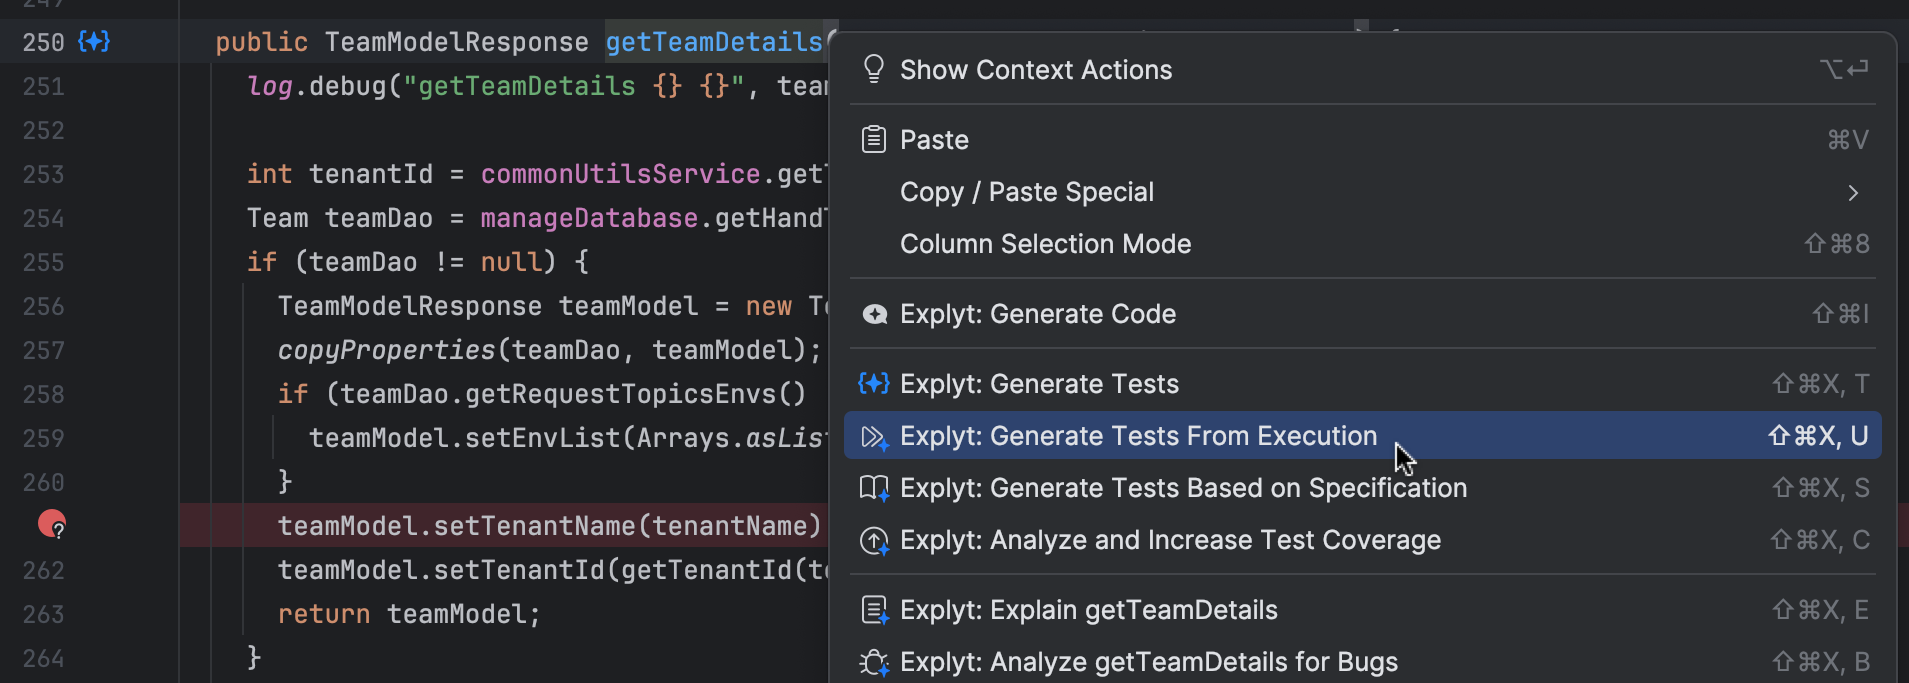
Just click the gutter icon next to the method you want to generate a test for.
Alternatively, right-click anywhere inside the method body and choose "Generate Tests From Execution" from the context menu.
2. Configuration Window
After triggering the action, you'll see the configuration window:
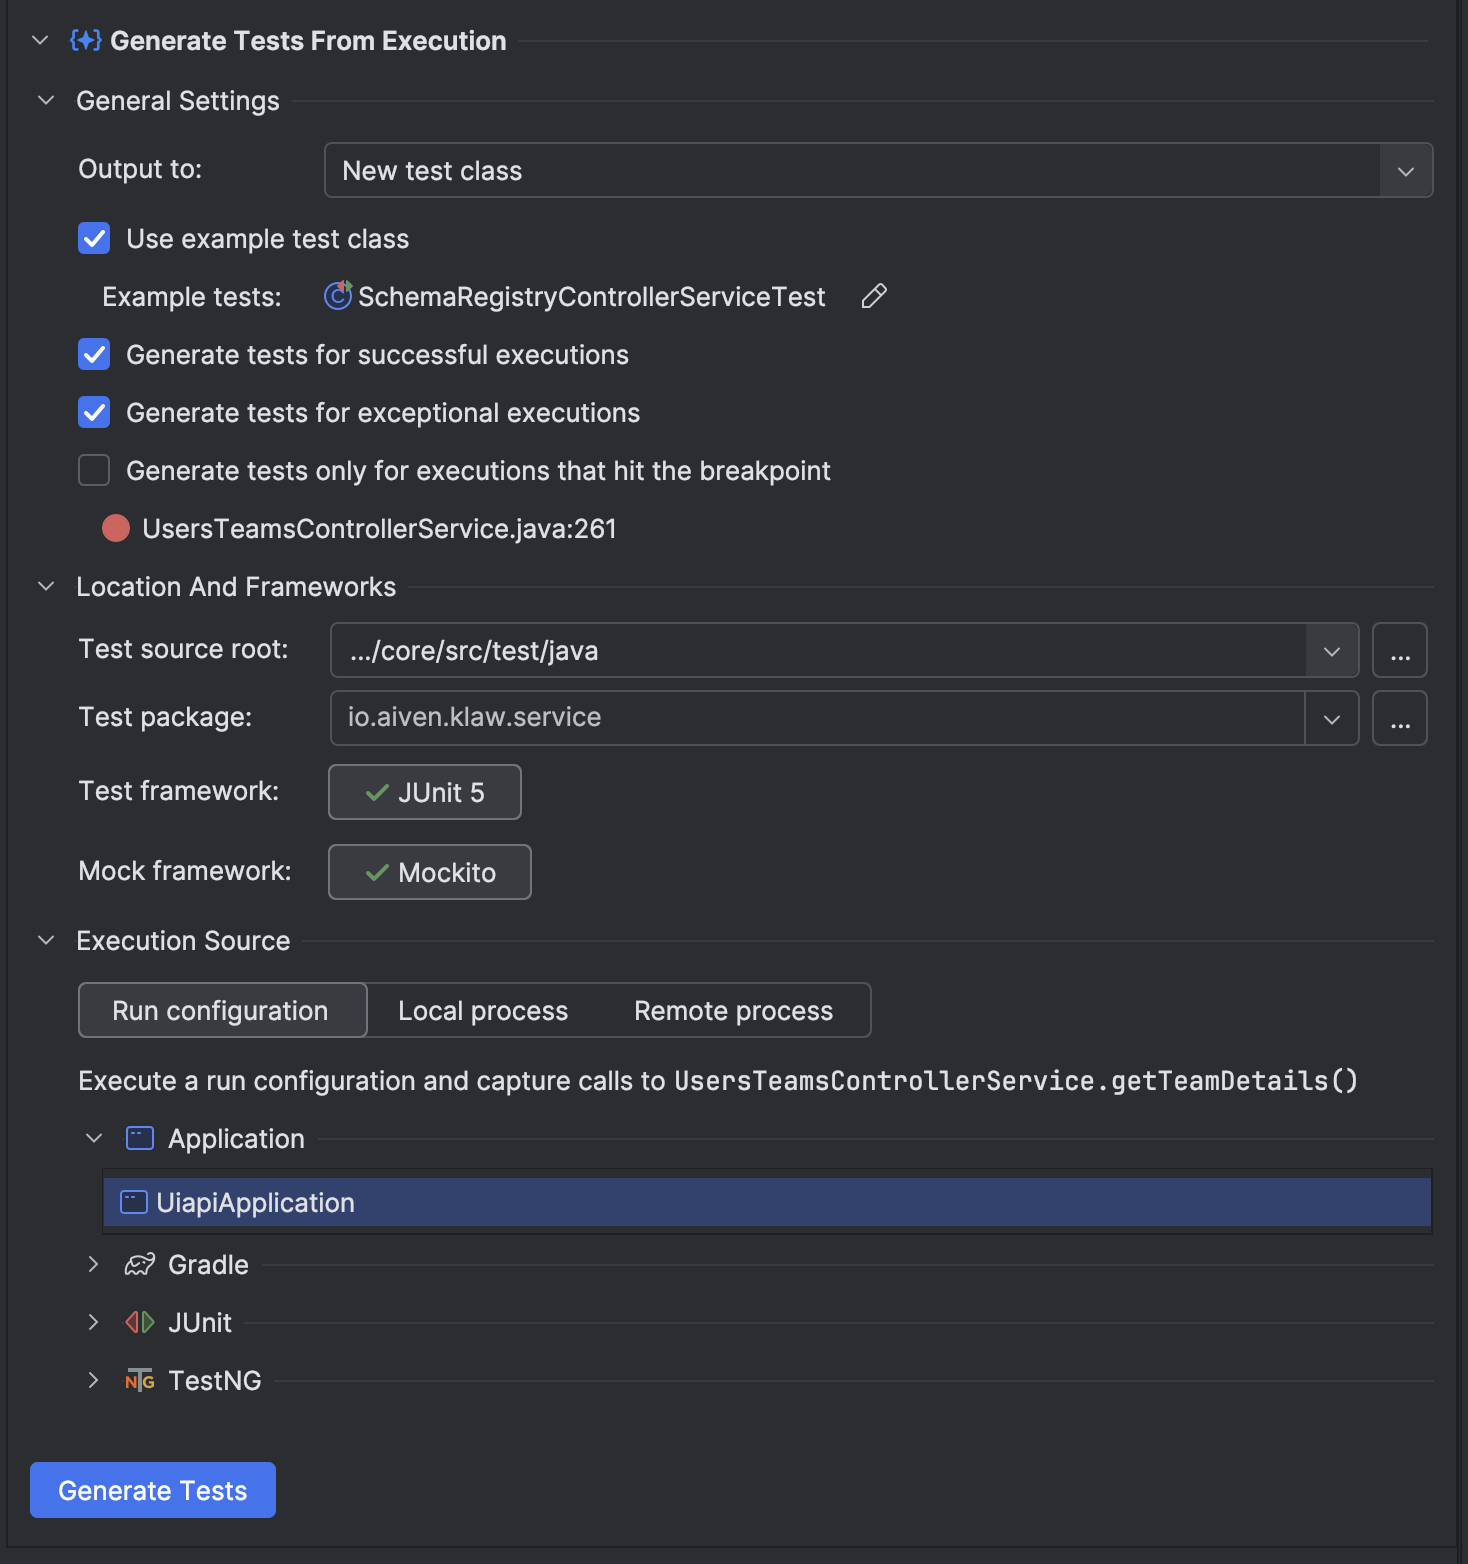
General Settings
-
Location
The directory where generated tests will be saved, typicallysrc/test/java. -
Test Framework
Displays all test frameworks available in the current project.
You can choose one to use for generation:- JUnit 5 – Recommended for modern Java and Kotlin projects.
- JUnit 4 – Suitable for legacy or mixed-codebases.
-
Mock Framework
Shows all detected mocking frameworks. Select the one to use in generated tests:- Mockito – Default for Java projects.
- MockK – Recommended for Kotlin due to better language integration.
- kotlin-mockito – Also supported as a fallback.
⚠ If no mock framework is detected, install one manually:
For Java (Maven):
<dependency>
  <groupId>org.mockito</groupId>
  <artifactId>mockito-core</artifactId>
  <version>[YOUR_VERSION]</version>
  <scope>test</scope>
</dependency>
For Kotlin (Gradle):
testImplementation("io.mockk:mockk:[YOUR_VERSION]")
Generation Settings
-
Use reference test class
If enabled, the generated test will inherit annotations, imports, and structure from the selected class.- Reference test class
Shows the chosen class (e.g.,SecurityUtilsUnitTest).
Click the pencil icon to edit.
- Reference test class
-
Generate tests for successful executions
Generates tests for calls that completed successfully. -
Generate tests for exceptional executions
Generates tests for calls that threw exceptions.
Execution Source
This section lets you choose how and from where to capture execution traces.
▶ Run Configuration
Use this mode to capture execution from one of your existing IntelliJ run configurations.
- All available previously executed configurations (e.g., JUnit tests, main methods, Maven/Gradle tasks) are shown in a tree view.
- Expand a group and select a specific method or class.
✔ Recommended for most use cases. Easy to set up — just click and go.
▶ Local Process
Attach to a locally running debuggable JVM to capture execution (e.g., for microservices, background jobs, or CLI apps).
Requirements:
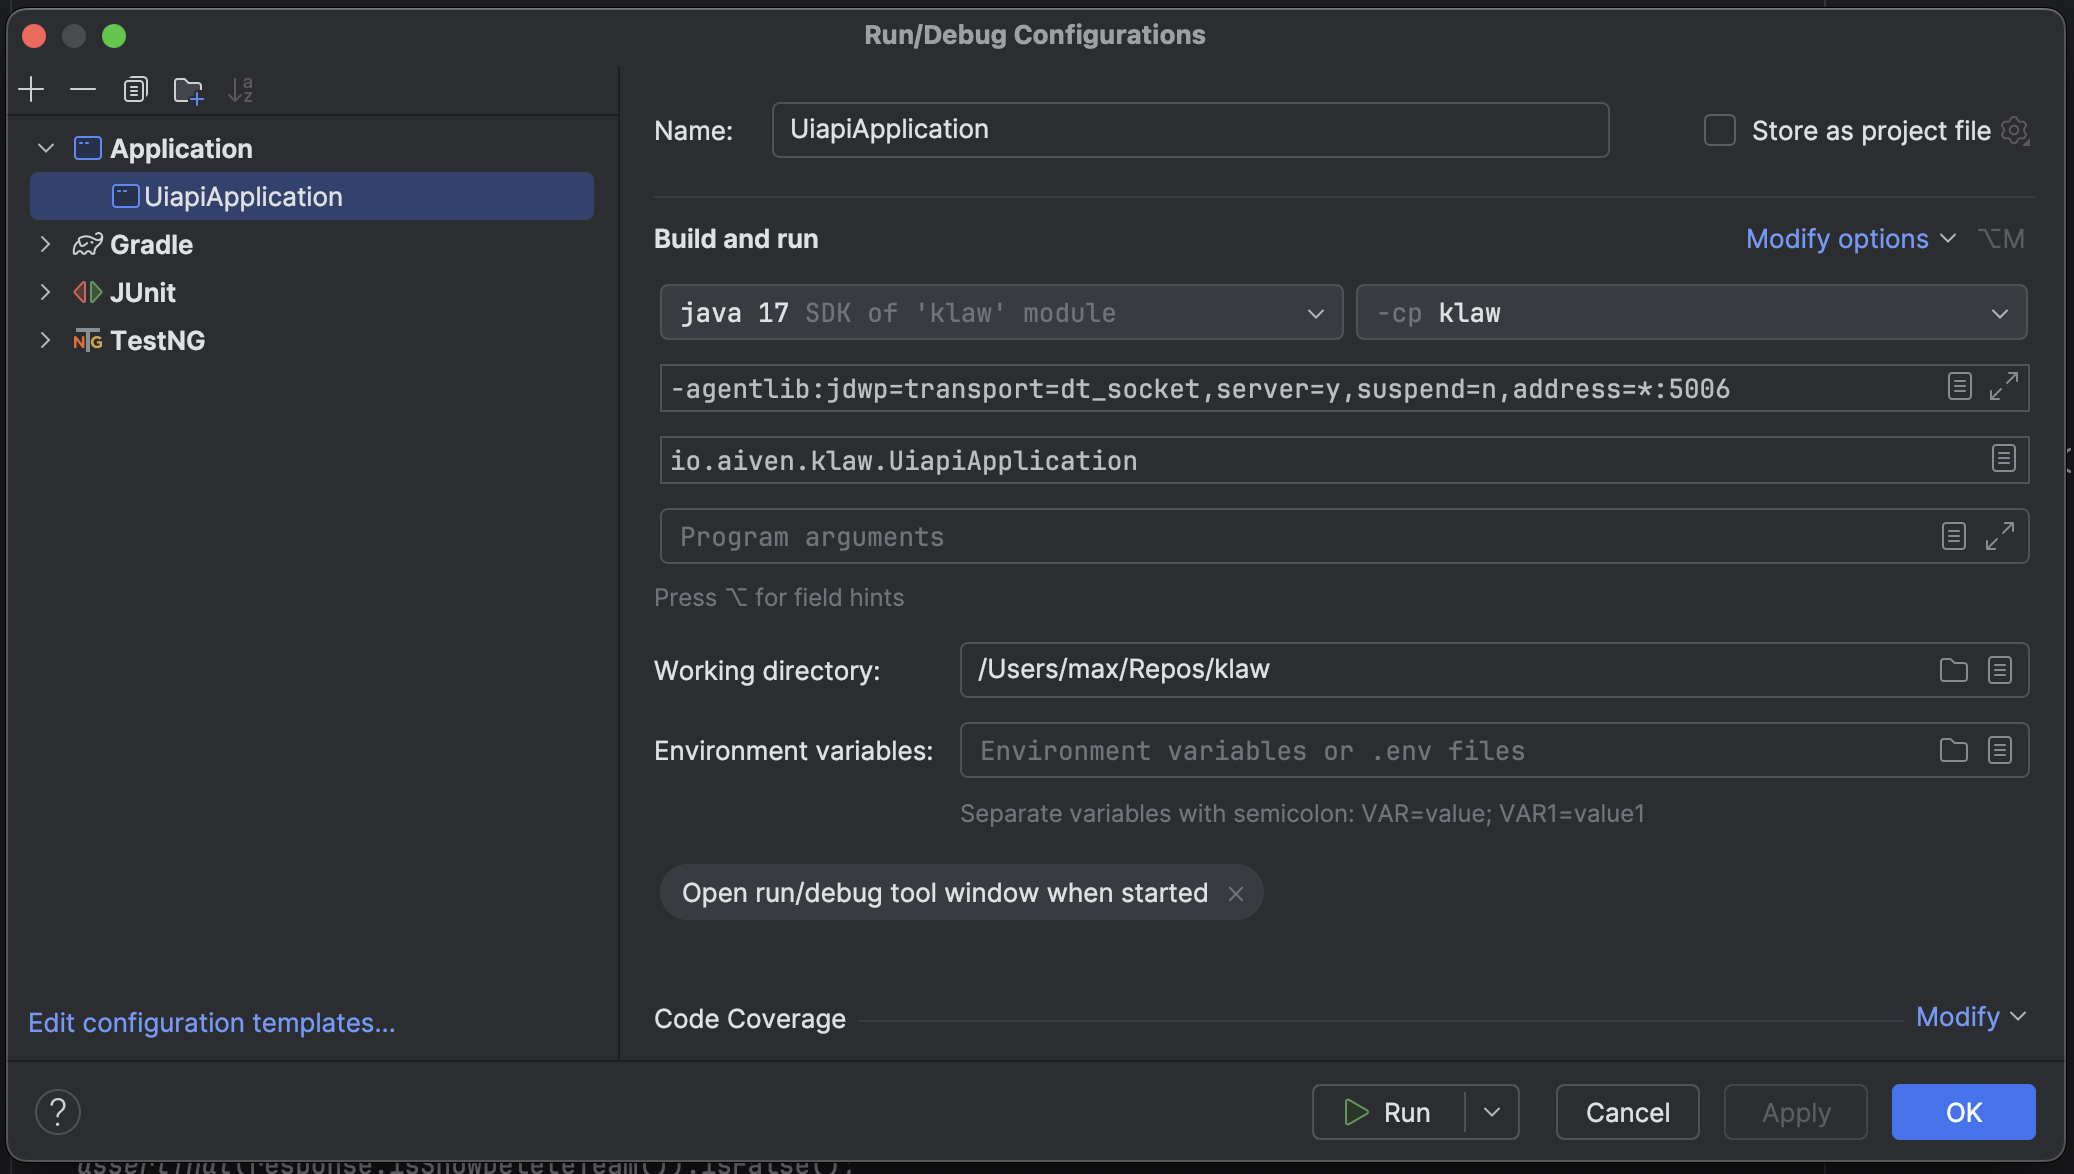
- Start your process with JDWP enabled using:
-agentlib:jdwp=transport=dt_socket,server=y,suspend=n,address=*:PORT
⚠ Using Java 8? Replace *: with just the port number: address=5005
- If the process is already running and debuggable, it will appear in the list below, e.g.:
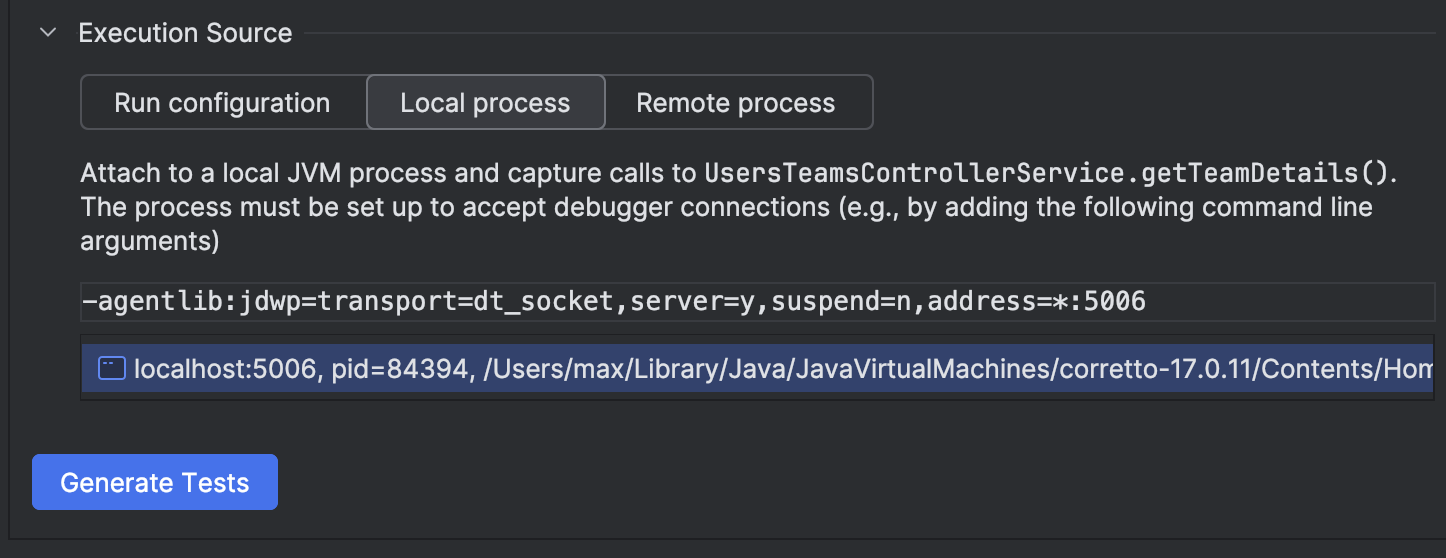
- Select the desired process and hit Generate Tests.
▶ Remote Process
Attach to a remote JVM (on a different machine, container, or staging server) and capture execution remotely.
Requirements:
- The remote JVM must be started with JDWP enabled:
-agentlib:jdwp=transport=dt_socket,server=y,suspend=n,address=*:PORT
- You will need to provide:
- Host – The IP or hostname of the target machine (e.g., 127.0.0.1 or staging.myapp.com)
- Port – The port that JDWP is listening on (e.g., 8000)
⚠ Make sure firewall rules or network policies allow this connection.
Generate Tests (Button)
Click this button to begin generating test cases using your current configuration and selected executions.
3. Execution Capture Progress
Once the capture begins, you'll see a progress window:

-
Starting configuration UserServiceIT and attaching to the process
Confirms the tool has attached to the JVM. -
Capturing calls to UserService.activateRegistration()
Shows the specific method being traced.
⏳ Tracing may take slightly longer than normal execution, as we record full argument and return value data.
-
Calls captured: N
Live counter of how many matching calls were observed. -
Stop Listening And Generate Tests (button)
Ends tracing and begins test generation. All captured calls will be converted to test methods.
Tip: You can invoke the target method multiple times — all calls will be recorded and included in the output.
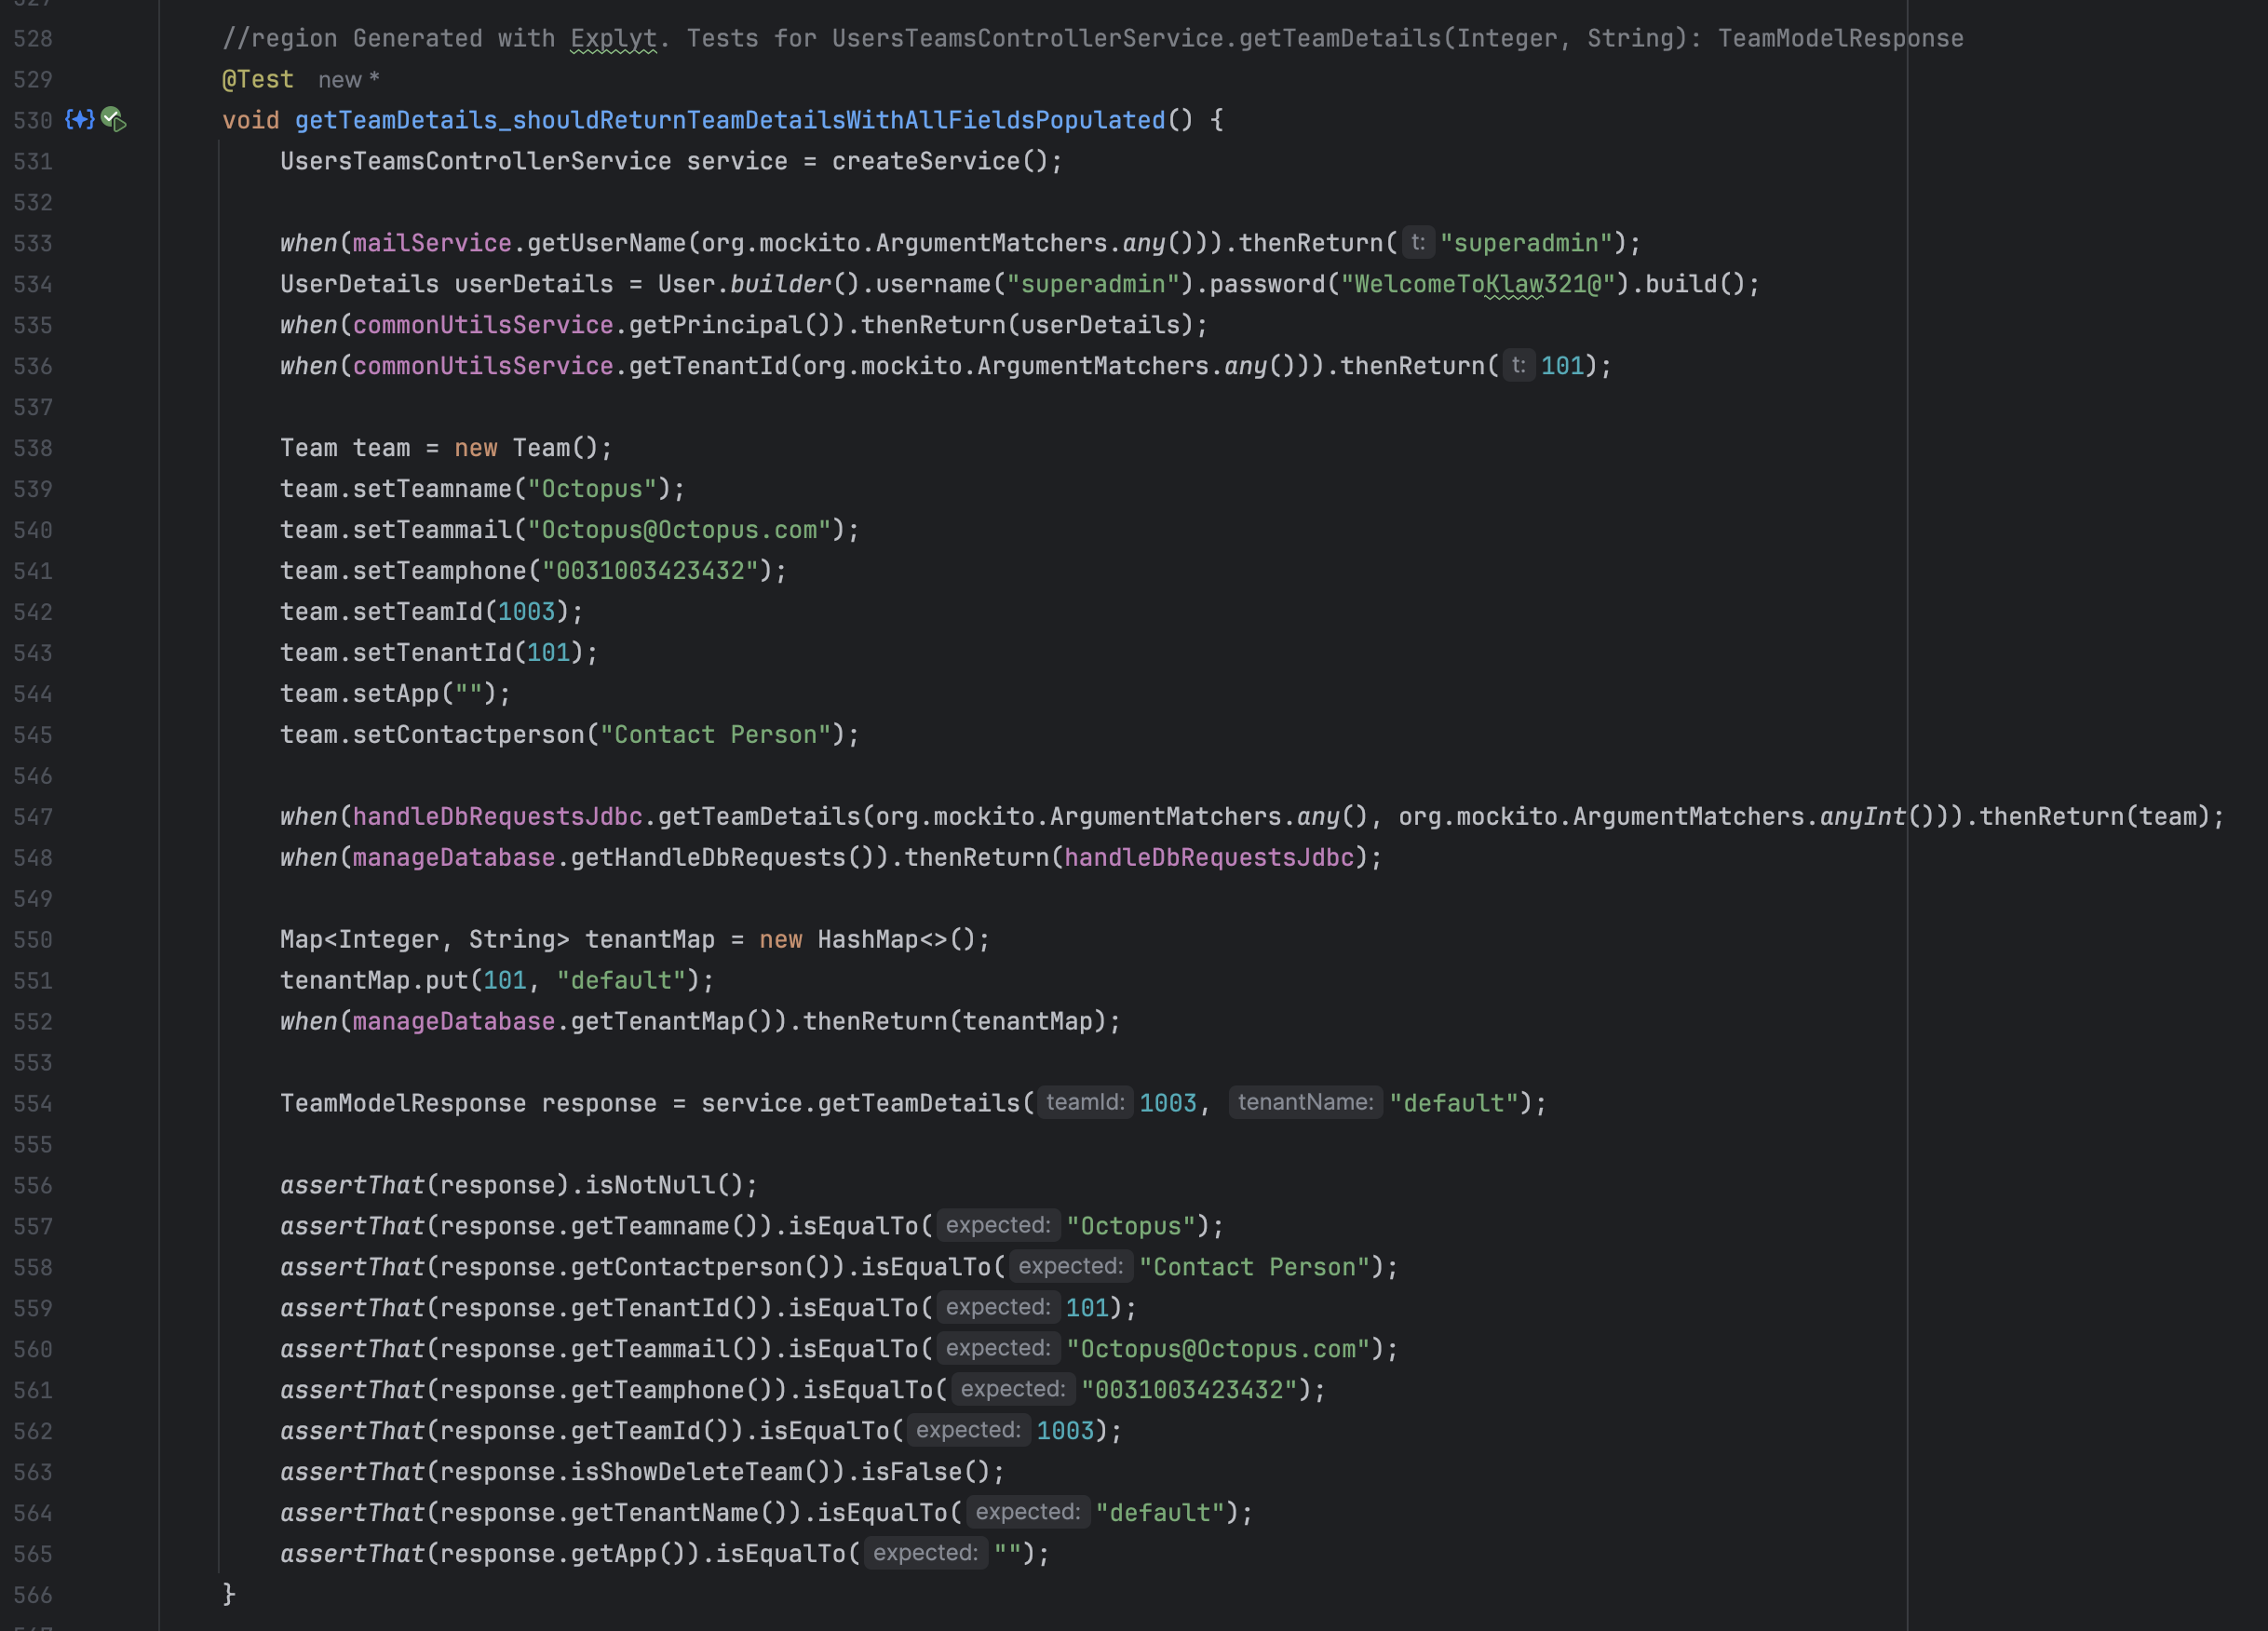
4. Enjoy Your Test!
Once generation is complete, the test is saved to the configured location (usually under src/test/java) and added to your project.
- The test is automatically refactored and polished using IntelliJ IDEA and AI-powered cleanup.
- Formatting, imports, naming, and structure are adjusted to match your project's style.
⚠ Some edge cases — like native resources, deep mocks, or external dependencies — might require a bit of manual tweaking. And that’s perfectly okay. Even generated code appreciates a little human touch.
If something doesn’t look quite right — feel free to adjust it, submit feedback, or build on top of it.
You’re still in control — we just help you skip the boring parts.